ASTROISO 17.12.2023
AstroISO is a tool for creating and extracting ISO-images. It is absolutely free.
The program can handle ISO-9660 files with the extensions "el torito bootable cd-rom"
and Joliet (16 bit unicode filenames). It is incompatible to images with UDF
filesystem. This includes images of CDs and DVDs created with the tools distributed
with Windows X. Most DVD images use the UDF filesystem today. The extension of
those files is .iso often, although there is no compatibility to ISO 9660.
AstroISO can be used to add programs to linuxmint-9-gnome-dvd-i386.iso, a free linux
Live-DVD with JAVA 1.6, which can be used to run JAVA applications and applets.
Download links and usage information can be found in linuxmintinfo.htm.
AstroISO is also compatible to astroiso.iso. That iso image can be downloaded
from a OneDrive folder of Astro Solutions. You find a link to it on astrosolutions.de.
You can add the files of astroiso.iso to linuxmint-9-gnome-dvd-i386.iso:
1. extract astroiso.iso to the empty temp directory with AstroISO
2. despace volume1jolietfilenametable.ini to temp/volume1despacedfiles with Despace
3. rename the temp directory
4. extract linuxmint-9-gnome-dvd-i386.iso to a new empty temp directory with AstroISO
5. move the files from the renamed temp/volume1despacedfiles directory
to temp/volume2
5b. optional you can copy compatibilityvolumes.ini from the AstroISO folder to
the temp directory, if you want to eliminate multiple references in the directory list
6. create a new iso image from the temp directory with AstroISO
7. the new linux Live-DVD iso can be burned on DVD or used with emulators
8. you find the JAVA applet games at Computer/File System/cdrom on the
Linux Mint desktop
The despace application remove all 0-byte values from the filenames.
This causes corrupt data in general, but the 0-bytes in the filenames
of astroiso.iso were added by spacing byte characters of filenames
to unicode characters with two bytes. This makes sense for Joliet
volumes in the iso image. Despacer is mainly programmed for astroiso.iso
and the joliet filename table ini file must be in the temp directory
of the same AstroISO and Despacer installation. The ini file is generated
automatically and its name mustn't be changed, if you want to despace
it or generate an iso image from it with AstroISO, because the volume
number is computed from it.
The temp directory can be deleted after you copied the data you needed,
if you want to create a new iso image. If you want to change data in
an extracted iso image, you should place to files in the volumex folders
(x is a number) in the temp directory and mustn't change the content or
names of the .img and .ini files in the temp directory.
If a file in a volumex folder already exists in the volumexjolietfilenametable.ini
list, which references files in the folder volumexjolietfiles, the file in
the volumex folder overwrites the other file.
If you want to extract linuxmint-9-gnome-dvd-i386.iso, you should delete the files
in the temp directory and select the iso file in AstroISO after clicking
"extract iso file". The files are copied to the folders volume0, volume1, volume2
and so on. If a volume folder stays empty, the iso image volume was empty or
the files were copied to volumexjolietfiles, because the joliet filenames are
incompatible to Windows X and are organised in volumexjolietfilenametable.ini.
If you want to add files to linuxmint-9-gnome-dvd-i386.iso, you should copy them
to the folder volume2 and select "create iso file" in AstroISO. The created
file contains the added files.
You can create bootable iso images with AstroISO, if you click "add boot image" and
select your binary code file. The example code file result.bin is included.
It prints a character on intel compatible CPUs. You must change
InitialDefaultEntryBootInformationTable to the value 0 in defaultentryscript.ini,
if you want to make it run. The value of 0 means, no boot information table is
added, a value of 1 means the opposite and the value 2 means, that a boot information
table is changed. If a boot image doesn't run, you can check the three possible
configurations. Linux Mint 9 requires a boot information table and result.bin must
run without.
If you want to create a new bootable iso image, the new boot image must be added
after the empty folder for data volume content.
You can create a Joliet iso image, if you enter 2 after VolumeDescriptorType and escapeseq.ini
after EscapeSequencesFilename in defaultdatavolumedescriptorscript.ini.
Then you need two volume descriptors. There must be a volume descriptor of type 1
and the second volume descriptor of type 2 can be of the type Joliet.
You can enter a volume identifier after Volume Identifier. This is the name of the
CD or DVD represented by the iso file. The escape sequences file contains bytes,
which control, which standards are used by the iso image.
If you extract an iso image, it is possible, that the sum of the length of the
files increases. The reason is, that files can be referenced multiple times.
The files can be up to 4GB long. One directory description must fit into the memory.
If it contains too many entries, the JAVA heap size could be too small. Normally
this should't be a problem.
If you want to create an iso file, where a compatibility filename directory list and a
joliet filename list reference the same files, you can use a compatibilityvolumes.ini
script and copy it to the temp directory before you click the create button.
Then large amounts of data can be reduced by avoiding copying the files multiple times
for every directory list during the creation process.
The following compatibilityvolumes.ini file is for linuxmint-9-gnome-dvd-i386.iso
DVD changes:
CompatibilityVolumes
SkippedVolumenr
0
CompatibilityVolumeForVolumenr
2
[END OF FILE]
This skips the files in the folder temp/volume0 and inserts compatibility filenames of
the filenames in the folder temp/volume2 (or temp/volume2jolietfiles) including
the data in the volume2 folders.
The .ini script files contain configuration values, which don't cause problems,
if you just want to create a non-bootable or a bootable iso image.
The folders, where you place the files for the image to be created, can be found in the
temp directory. If there are problems with bootable images, you should test the three
InitialDefaultEntryBootInformationTable values described above. But UDF
file systems are completely not supported. If you can't read a iso file, you
should test, if the contained file system is UDF. AstroISO is compatible to
Windows and Linux filenames.
If you extracted an iso image and want to extract the next iso image, you should
clean the temp folder, where the files were written to. Otherwise a mix of files of
both iso images are added to a new iso image, if you create a new iso image.
The .img files created by the program are internal files, which can't be viewed
with other programs. If a new boot volume is created or a bootable iso is extracted,
volumexaddressestoupdate.ini is created. There you can choose NoBootInformationTable,
AddBootInformationTable and ChangeBootInformationTable for the next creation
of an iso image. These strings correspond to the InitialDefaultEntryBootInformationTable
values 0, 1 and 2. If you test those values, you may get a crashing boot image run.
Three simple tasks
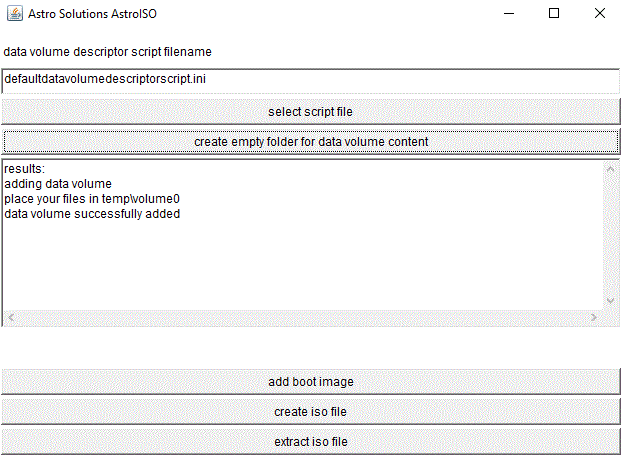
Creating a simple iso file with data:
1. delete the files in the temp directory
2. click "create empty folder for data volume content"
3. copy your files to temp/volume0
4. click "create iso file"
Creating an iso file with compatibility volume:
1. delete the files in the temp directory
2. click "create empty folder for data volume content"
3. click "select script file"
4. select supplementarydatavolumedescriptorscript.ini (VolumeDescriptorType 2, EscapeSequencesFilename escapeseq.ini)
5. click "create empty folder for data volume content"
6. copy compatibilityvolumes.ini to the temp directory
7. change the content to the following description sequence:
CompatibilityVolumes
SkippedVolumenr
0
CompatibilityVolumeForVolumenr
1
[END OF FILE]
8. copy your files to temp/volume1
9. click "create iso file"
Extracting an iso image:
1. delete the temp directory
2. click "extract iso file"
3. you find the extracted files in the temp/volumex folders
4. you find the boot image as volumexboot0.bin in the temp directory, if the iso file is bootable
It took 16 days to write AstroISO. There is a version for JAVA 1.1.8 and JView,
which uses a deprecated JAVA API and a Swing version for JAVA 1.8, which
doesn't use a deprecated JAVA API. The Swing version can be found in a subfolder.